 Save to Pinterest
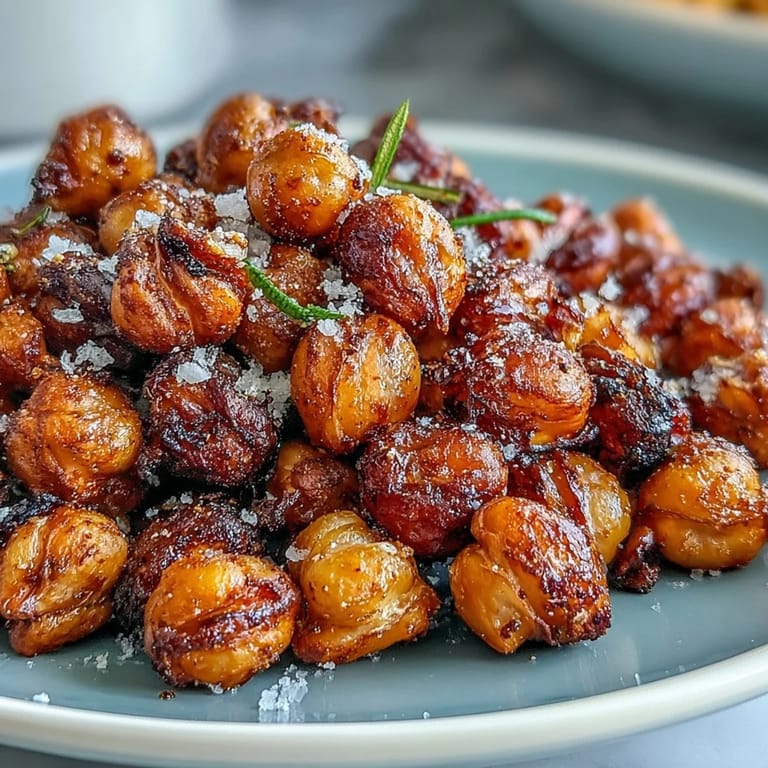
 My kitchen smelled like a spice market the afternoon I first attempted these chickpeas, though honestly it started as pure accident. I'd opened a can intending to make hummus, got distracted by something on the stove, and suddenly thought: what if I just roasted these instead? The result was so addictively crunchy that I found myself sneaking handfuls straight from the cooling sheet, burning my fingers like some kind of enthusiastic squirrel. Now they're what I make when I need a snack that feels both indulgent and virtuous at the same time.
My friend Marco came over on a slow Tuesday evening when I was testing batch after batch, and he sat at my counter eating them like they were going extinct. He kept saying things like "these are dangerous" and "why doesn't everyone just do this," which made me realize these weren't just a snack but something that made people genuinely happy. Now whenever he visits, the first thing he asks is whether I've made a fresh batch.
Ingredients
- Chickpeas: One 15-ounce can, drained and rinsed thoroughly, or 1½ cups cooked from scratch if you're feeling ambitious. The drier you can get them before roasting, the crunchier they'll become—this is the secret that separates mediocre from magnificent.
- Olive oil: 1½ tablespoons of good olive oil that you actually like tasting, since it's one of only a handful of ingredients. Don't save your fancy bottle, but don't use the cheapest option either.
- Smoked paprika: ½ teaspoon brings a gentle warmth and color without overwhelming the other spices. It's the friend that makes everyone else in the mix taste better.
- Ground cumin: ½ teaspoon adds an earthy note that whispers rather than shouts, grounding the whole flavor profile.
- Garlic powder: ½ teaspoon for savory depth without any moisture that might interfere with crisping.
- Ground cayenne pepper: ¼ teaspoon optional, for anyone who enjoys a gentle heat that lingers pleasantly on the tongue.
- Sea salt: ¾ teaspoon of fine salt that dissolves evenly and doesn't create bitter pockets. Taste as you go and adjust to your preference.
- Black pepper: ¼ teaspoon freshly cracked if you have a grinder, for brightness and bite.
Tired of Takeout? 🥡
Get 10 meals you can make faster than delivery arrives. Seriously.
One email. No spam. Unsubscribe anytime.
Instructions
- Get your oven ready and set the stage:
- Preheat to 400°F (200°C) and line a baking sheet with parchment paper so cleanup feels effortless later. You want everything in place before the chickpeas are sitting there getting moist.
- Dry those chickpeas like your life depends on it:
- Pat them thoroughly with paper towels, working in batches if you need to, getting off every drop of moisture you can. This step is what transforms them from soft legumes into shatteringly crisp bites.
- Spread them out to breathe:
- Arrange chickpeas in a single layer on the prepared sheet, leaving a little space between each one so hot air can circulate all around them. Don't crowd them like they're on a crowded subway.
- First roast for the groundwork:
- Pop them into the oven for 20 minutes, shaking the pan once halfway through so they brown evenly. You'll start hearing them rattle around after about fifteen minutes, which is always satisfying.
- Season with intention:
- Remove from the oven, drizzle with olive oil while they're still warm so it coats beautifully, then sprinkle paprika, cumin, garlic powder, cayenne if you're using it, salt, and pepper over top. Toss everything together until every chickpea is dressed in spice.
- Second roast for the crunch:
- Return to the oven for another 12 to 15 minutes, shaking once more, until they're deep golden and making that delicious crackling sound when you move the pan. You're looking for color but not char, warmth but not burnt.
- Let them rest and finish crisping:
- Spread them on a clean surface or leave them on the sheet for about 10 minutes as they cool, during which they'll continue to firm up into their final, most delicious state. Resist eating them immediately, though honestly, if you can't, nobody's judging.
 Save to Pinterest
 There was an evening when my sister came home exhausted from work and found a bowl of these waiting for her on the counter. She ate them while telling me about her terrible day, and somehow they turned the moment into something lighter and brighter. It reminded me that the best food isn't always the complicated stuff—sometimes it's just something crispy and warm, made with a little intention.
The Joy of the Simple Spice Mix
What I love about this particular seasoning combination is how it plays together like old friends who know each other's rhythms. The smoked paprika brings richness and color, the cumin grounds everything with earthiness, and the garlic powder keeps things savory without making them feel heavy. It's the kind of blend that tastes sophisticated without requiring you to pronounce anything difficult or hunt down obscure ingredients. Once you've made this version a few times, you'll start to feel what your own palate wants and adjust accordingly.
Storage and Keeping Them Fresh
These are best enjoyed within three days of roasting, stored in an airtight container at room temperature where they'll stay wonderfully crispy. If they somehow soften over time (which means you made too many and didn't eat them fast enough), you can always give them a quick 5-minute second roast in a 350°F oven to bring back the crunch. I keep mine in a small glass jar on my counter where I can see them, which is both a storage strategy and an effective way to eat them all before they have time to soften.
Playing with Flavor Possibilities
Once you've mastered the basic technique, the spice world opens up in delicious directions. I've made batches with curry powder for an Indian-inspired warmth, tried chili powder for something more assertive, sprinkled zaatar for herbaceous complexity, and even went Italian with dried oregano and a pinch of red pepper flakes. The foundation stays the same—drying, roasting, and that patient cooling time—but the flavor personality changes completely depending on your mood and what you're craving.
- Try dusting them with sumac for a lemony brightness that feels refreshing.
- Mix in some nutritional yeast for a savory, umami-forward version.
- Keep them plain and use them as a salad topper or grain bowl crunch element so they play well with other flavors.
 Save to Pinterest
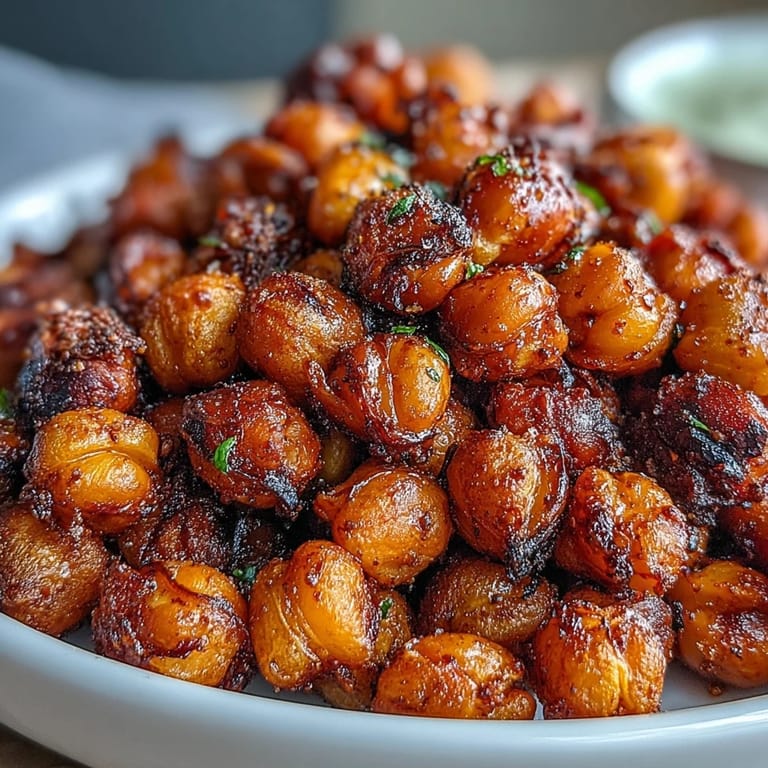
 These little roasted chickpeas have become my go-to proof that the simplest things in cooking often deliver the biggest satisfaction. Make a batch this week and notice how quickly they disappear.
Recipe FAQs
- → Why aren't my chickpeas getting crispy?
Excess moisture prevents crisping. Pat chickpeas thoroughly with paper towels until completely dry before roasting. Peeling the loose skins also helps achieve extra crunch.
- → Can I use dried chickpeas instead of canned?
Yes. Cook dried chickpeas until tender, drain well, and pat completely dry before roasting. They may need slightly longer roasting time to reach desired crispiness.
- → What spices work well for seasoning?
Curry powder, chili powder, zaatar, or Italian herbs make excellent alternatives. Adjust heat level with more or less cayenne pepper according to preference.
- → How long do roasted chickpeas stay fresh?
Store in an airtight container at room temperature for up to 3 days. They'll lose some crunch over time but can be quickly recrisped in a warm oven for 5-10 minutes.
- → What's the purpose of roasting in two stages?
The initial roasting dries out the chickpeas, while the second stage with oil and spices creates the flavorful coating. This method ensures even cooking without burning the spices.