 Save to Pinterest
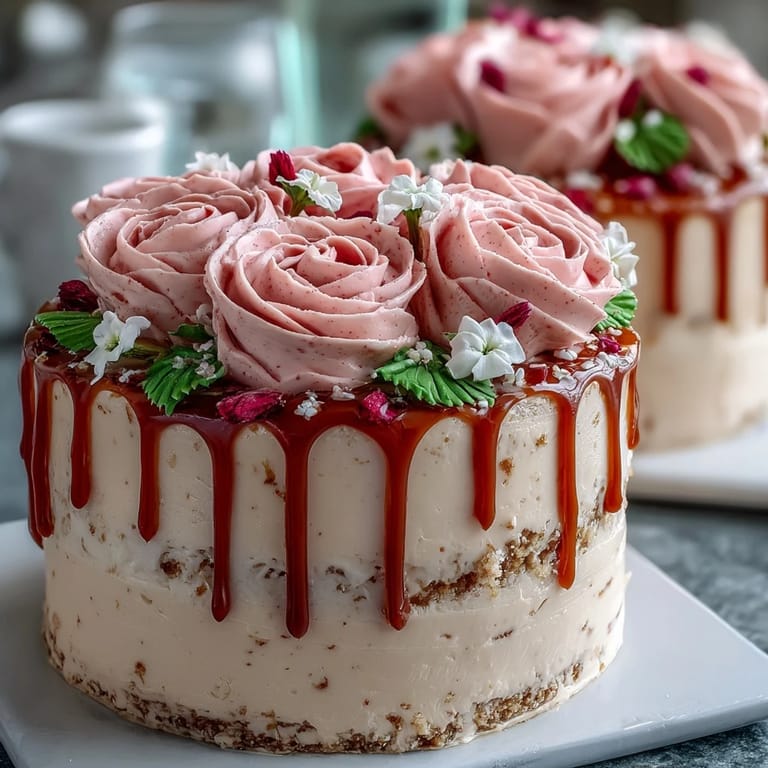
 There's something magical about the moment a cake becomes a celebration. I'd been asked to make a graduation cake for my neighbor's daughter, and instead of defaulting to store-bought, I decided to try something I'd only admired from afar: buttercream roses. The kitchen filled with the warmth of vanilla as the cake baked, and somewhere between mixing and piping, I realized this wasn't just about the cake—it was about marking a milestone with something handmade and beautiful.
I'll never forget frosting that cake the morning of the party, my hands getting steadier with each rose. By the time I'd piped the tenth one, I stopped overthinking and just let my hands do what they wanted. When the graduate's mom saw it, she teared up—not because it was flawless, but because it carried the love of someone who'd spent hours learning something new just for her daughter's big day.
Ingredients
- All-purpose flour: The foundation of a tender crumb; make sure it's measured by spooning into a measuring cup and leveling off, not scooping directly from the bag, which can pack it down and throw off your ratios.
- Baking powder and baking soda: These work together to give you that perfect rise—baking powder for most of the lift, baking soda for a little extra tenderness and that subtle depth.
- Unsalted butter: Room temperature is non-negotiable; it creams properly with sugar and distributes evenly throughout the batter, giving you a cake that's neither dense nor dry.
- Granulated sugar: The beating time here matters more than you'd think; the longer you cream butter and sugar together, the more air you incorporate, and that's where the lightness comes from.
- Eggs: Also room temperature, because cold eggs won't emulsify properly with the butter, and you'll end up with a batter that looks broken and separated.
- Vanilla extract: Pure vanilla is worth it here; the real stuff has subtle complexities that make the whole cake taste less one-dimensional.
- Whole milk: The fat content keeps the cake moist and rich; I learned this the hard way when I used skim milk and got something closer to a sponge.
- Powdered sugar: Sifting it before using prevents lumps that'll ruin your otherwise silky buttercream and waste your time later trying to beat them out.
- Gel food coloring: This is the secret to vibrant roses without watering down your frosting; liquid coloring will make your buttercream thin and runny, and you'll be frustrated.
Tired of Takeout? 🥡
Get 10 meals you can make faster than delivery arrives. Seriously.
One email. No spam. Unsubscribe anytime.
Instructions
- Prep your pan and preheat:
- Set your oven to 350°F and give it time to heat properly while you grease a 12x18-inch sheet pan and line it with parchment paper. Cold pans and ovens that aren't fully preheated are the silent killers of even baking.
- Dry ingredients, combined and ready:
- Whisk flour, baking powder, baking soda, and salt together in a bowl; this distributes the leavening agents evenly so you don't end up with unexpected bitter pockets of baking soda. Set it aside and don't overthink it.
- Cream butter and sugar until clouds form:
- Beat room-temperature butter and sugar for 3 to 4 minutes until it's pale, fluffy, and looks like cumulus clouds. This is where the cake's structure and lightness come from, so don't rush it or skip ahead.
- Add eggs one at a time, beating between each:
- Drop in one egg, beat until it's fully incorporated and the mixture is smooth again, then add the next. This ensures the batter stays emulsified and creamy, not curdled and grainy.
- Mix in vanilla and alternate the wet and dry:
- Stir in vanilla, then add about a third of the flour mixture, beat gently, add half the milk, beat gently, then continue alternating until everything's combined and you finish with flour. Overmixing at this stage develops gluten and toughens your cake, so be gentle.
- Pour, smooth, and bake until golden:
- Spread the batter evenly into the prepared pan and bake for 30 to 35 minutes until a toothpick comes out clean and the edges are just starting to pull away from the sides. The smell when it's done is incredible—nutty and vanilla-forward.
- Cool completely before frosting:
- Let the cake sit in the pan on a wire rack for at least an hour, preferably longer, until it's completely cool. A warm cake will melt your buttercream and ruin all your piping dreams.
- Beat butter until creamy and bright:
- Cream the softened butter on its own until it's nearly white and fluffy, about 2 minutes, before you start adding powdered sugar. This base is what keeps your frosting light and easy to work with.
- Add sugar gradually, then milk and vanilla:
- Sprinkle in powdered sugar a handful at a time, beating between additions, then add milk and vanilla at the end and beat until smooth and fluffy, about 5 minutes total. Patience here gives you frosting that's spreadable and pipeable, not gritty or dense.
- Divide and tint your frosting:
- Scoop the buttercream into separate bowls and add gel food coloring a tiny bit at a time, mixing until you've got the shades you want for roses, leaves, and any accents. Gel coloring won't thin your frosting the way liquid will, and the colors stay vibrant even after a few days.
- Spread the base layer smoothly:
- Use an offset spatula to apply a thin, even layer of white buttercream across the cooled cake; this gives your piped roses something to grip onto and keeps them from sliding around. Take your time with this step—it's easier than it looks.
- Pipe roses with intention and a petal tip:
- Fit a piping bag with a petal tip, fill it with colored buttercream, and start piping by holding the bag at a 45-degree angle, wiggling slightly as you move the bag in a spiral motion. Each rose takes about 30 seconds once you get the motion down, and they get more beautiful the more you make.
- Add leaves and finishing details:
- Switch to a leaf tip and pipe green leaves between and around the roses, then use a small round tip to pipe your congratulations message or the graduate's name in a color that complements the design. These final touches are what transform a pretty cake into something truly memorable.
 Save to Pinterest
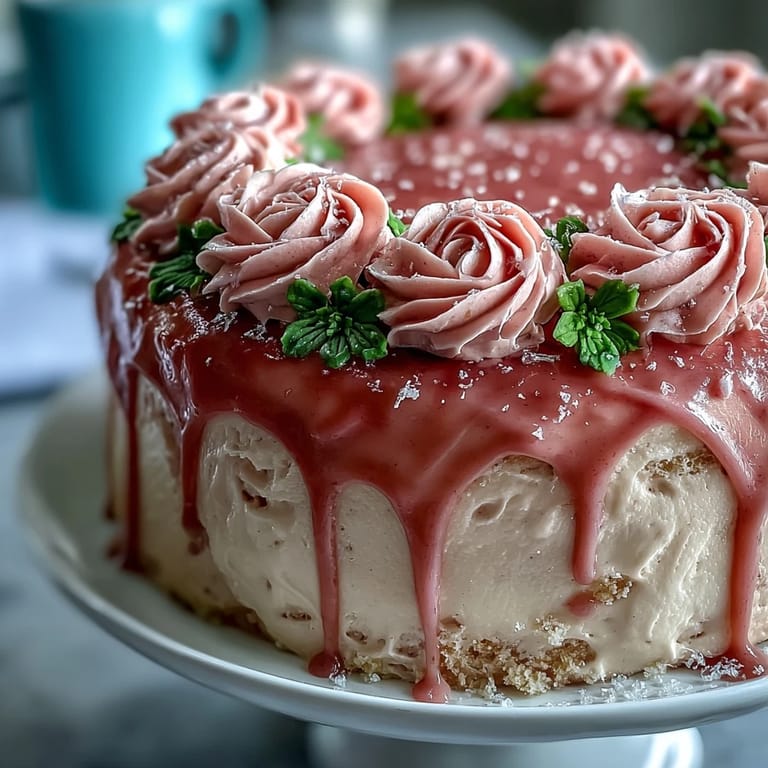
 Watching that graduate's face light up when she saw her cake was the moment I understood why people spend hours in kitchens making things from scratch. It wasn't perfect—one rose was slightly lopsided, the letters weren't perfectly straight—but it was made with real butter, real eggs, and real care. That's something no grocery store cake can ever match.
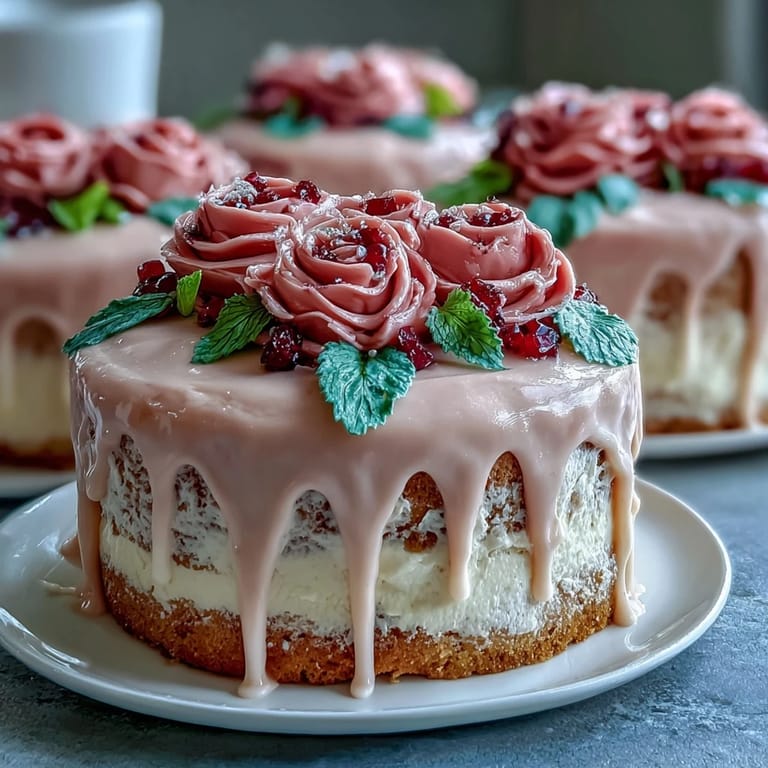
Chocolate Variation Option
If vanilla feels too traditional for your celebration, you can swap in chocolate by replacing 3/4 cup of the all-purpose flour with 3/4 cup of unsweetened cocoa powder. The chocolate version is richer and deeper, and it pairs beautifully with the same buttercream roses; just keep the white base layer so the colors of your piped flowers really pop against the dark cake.
Storing Your Masterpiece
Sheet cakes with buttercream are forgiving creatures; they'll sit happily on the counter covered loosely with plastic wrap for up to two days, or you can refrigerate them for up to five days if you want extra insurance. I learned through trial and error that refrigerating actually makes them slightly easier to serve—the frosting sets firmer and slices come out cleaner—so don't hesitate to bake this a day ahead.
Celebrating the Moment, One Slice at a Time
This cake is built for sharing and for savoring the idea that someone you care about took hours to make something beautiful just for you. Serve it with something celebratory—sparkling lemonade, champagne, cold milk, or whatever fits the mood—and let people taste not just the vanilla and butter, but the love that went into every piped rose.
- If your piping bag gets too warm while you're decorating, stick it in the freezer for five minutes to firm everything back up.
- You can prep the buttercream the night before and store it in an airtight container at room temperature, then re-whip it for 30 seconds before piping.
- The cake tastes better the next day once the flavors have settled and deepened, so don't stress about serving it immediately after frosting.
 Save to Pinterest
 This cake exists to mark moments that matter, and every time you make it, you'll get a little better at coaxing those buttercream roses into existence. That's the real celebration.
Recipe FAQs
- → How do I ensure the buttercream is smooth and fluffy?
Beat the butter until creamy before gradually adding powdered sugar, milk, and vanilla. Continue beating for about 5 minutes until light and fluffy for optimal texture.
- → What is the best way to pipe buttercream roses?
Use a petal piping tip and rotate the piping bag in your hand while squeezing consistent pressure to create delicate rose petals. Practice on parchment before decorating the cake.
- → Can I store the cake after decorating?
Yes, keep the cake covered at room temperature for up to 2 days or refrigerate for up to 5 days to maintain freshness and stability of the buttercream.
- → How can I add vibrant colors to the buttercream?
Use gel food coloring to tint separate buttercream portions. Gel colors provide vivid hues without altering consistency or causing runniness.
- → Is there a variation to add chocolate flavor?
For a chocolate version, substitute ¾ cup of flour with ¾ cup unsweetened cocoa powder in the cake batter before baking.